What’s an Automation?
Kicking off my blog with a topic that almost everyone asks me about – automations in ClickUp. ????
Now, what I always tell my clients is to make sure you’ve got your ClickUp foundation built first, before you jump ahead to automations. Why? If you imagine your ClickUp workspace as a filing cabinet of sorts, you need to have your hanging file folders and your manila file folders labeled and ready to go before you can start organizing that stack of paperwork that’s been staring at you for months. ????
In short, you want to be prepared (you purchased the file folders) and have a system to organize them (labels). You’ll probably group similar folders together. This will help you file things more quickly.
And the same is true for your ClickUp workspace. You want to understand the hierarchy so that you can understand how your automation will function and how to set it up so that it will help you eliminate manual processes.
Be sure to build your foundation, optimize your processes, and then return to automations.
I know that some of you have structured and organized ClickUp workspaces already so you’re ready for this. Even if you have only one structured and organized list that’s working for you, you can start automating. You can even start with the pre-built simpler automations to get a taste of what you can do.
This article will explain what an automation is, show you how you can build one in ClickUp, and give you a few easy automations to build to get started.
Actions & Triggers
An automation combines an Action and a Trigger to make a repetitive action happen automatically, saving you time. ClickUp has a bunch of pre-built automations for you to use or you can build your own custom automation.
Before you start building, you need to know what a trigger is. A trigger is what must happen to start the automation. Think about your dishwasher. When you push the “start” button, it triggers the action of the dishwasher running. The action is what happens after the trigger. If you’re on the Business plan or higher, in ClickUp you can add in conditions, things that must be true in order for the action to occur.
What You Need To Know First
In ClickUp, you can set up an internal automation at the list, folder, or space level. However, it’s important that you know how to do the process manually first. Before you start building an automation, make sure you have first done the following:
- Document all the steps of their process. There are almost always more steps than they had realized or they were missing a step or there was an opportunity for improving or streamlining their process. It’s good to involve all the team members who are involved in the tasks in this process in the documentation as they have useful insight to add and can point out the steps that tend to be bottlenecks.
- Determine how we are going to set the process up in ClickUp. Tasks, subtasks, checklists, dependencies, relationships. How can we keep the process simple and easy to follow for the whole team?
- Identify which steps in the process can be automated. Steps like changing the assignee after something happens or adding a comment when something happens can save time and reduce the occurrence of manual errors.
- Center your strategy and goal in automating this process. What are we trying to achieve? One of my clients had a messy process for scheduling monthly review sessions with their clients. The meetings weren’t being scheduled as they had no clear process. We took a close look at the process to identify why and where things were falling through the cracks, improved the process, and automated a few of the steps. Now their meetings are being scheduled every month and they’re no longer at risk of losing those clients. You too can automate the tasks that tend to go over looked – or at least make sure that no one is forgetting about them.
- Create a task to reevaluate the process each quarter.
How to Build an Automation in ClickUp
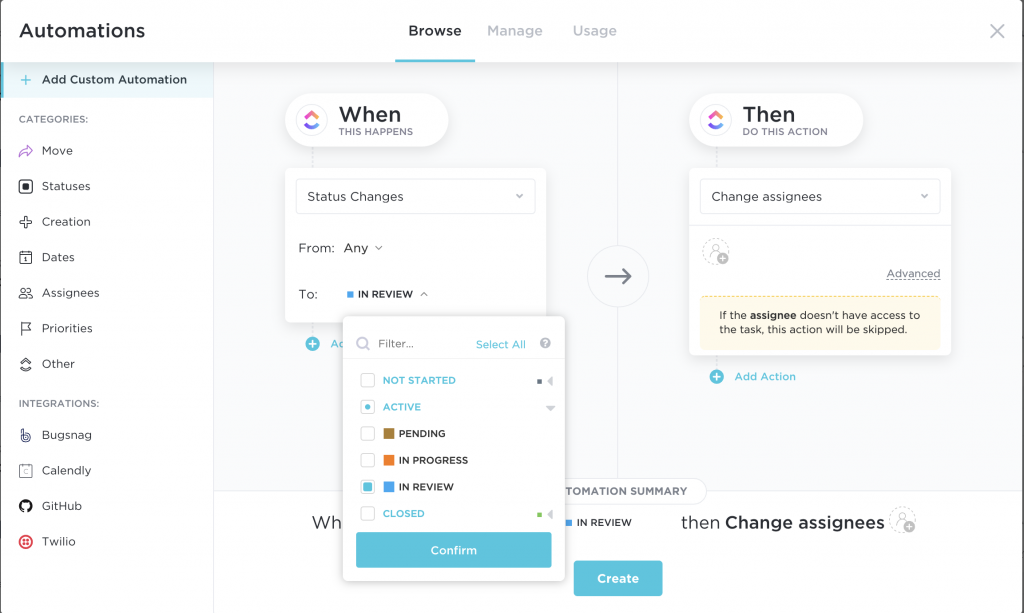
For this example, let’s create an automation where all tasks with the status “in review” in this space are assigned to me.
- Open the space settings.
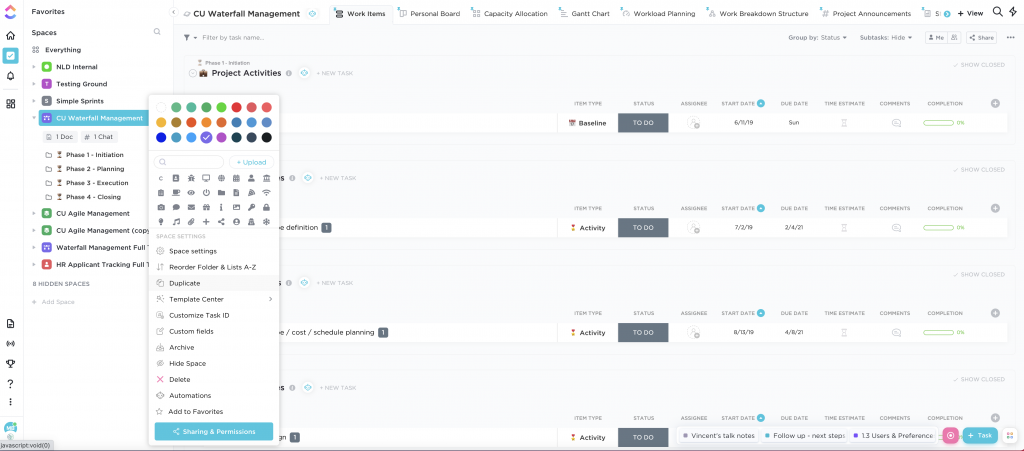
- Click on the automation icon.
- Select “Add automation” or choose one of the quick pre-built automations.
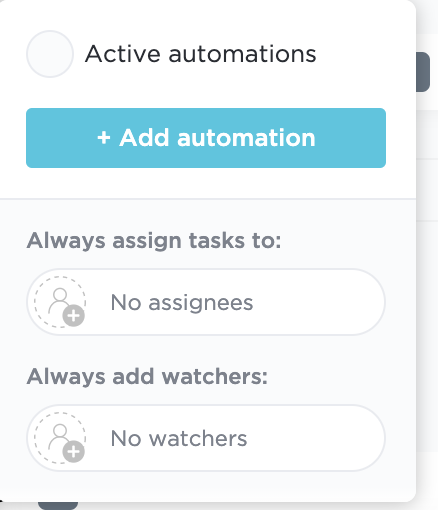
- Select the status category and choose the prebuilt automation “When status changes change assignee”.
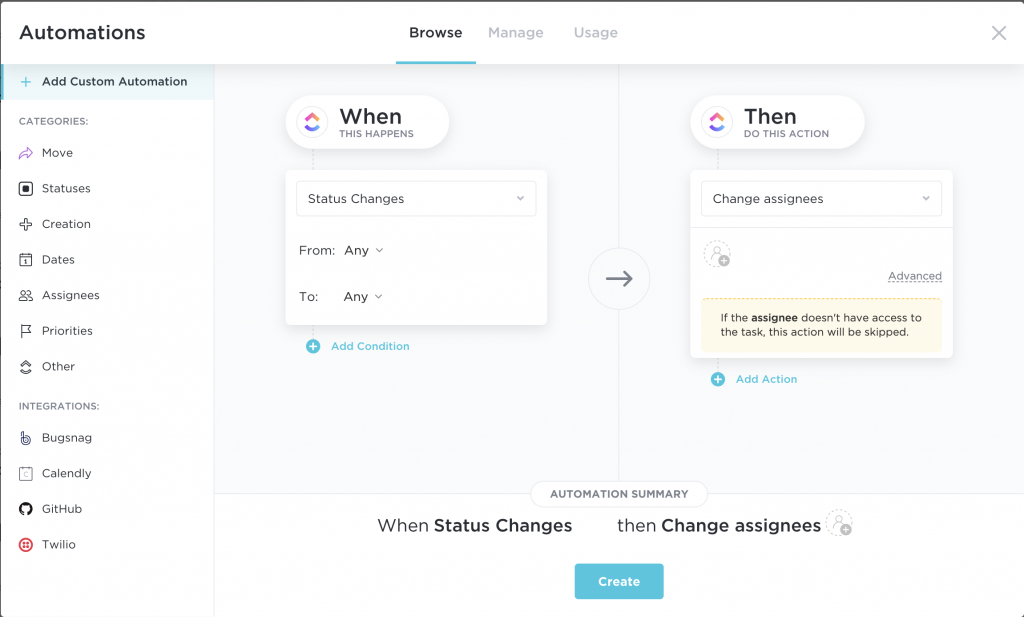
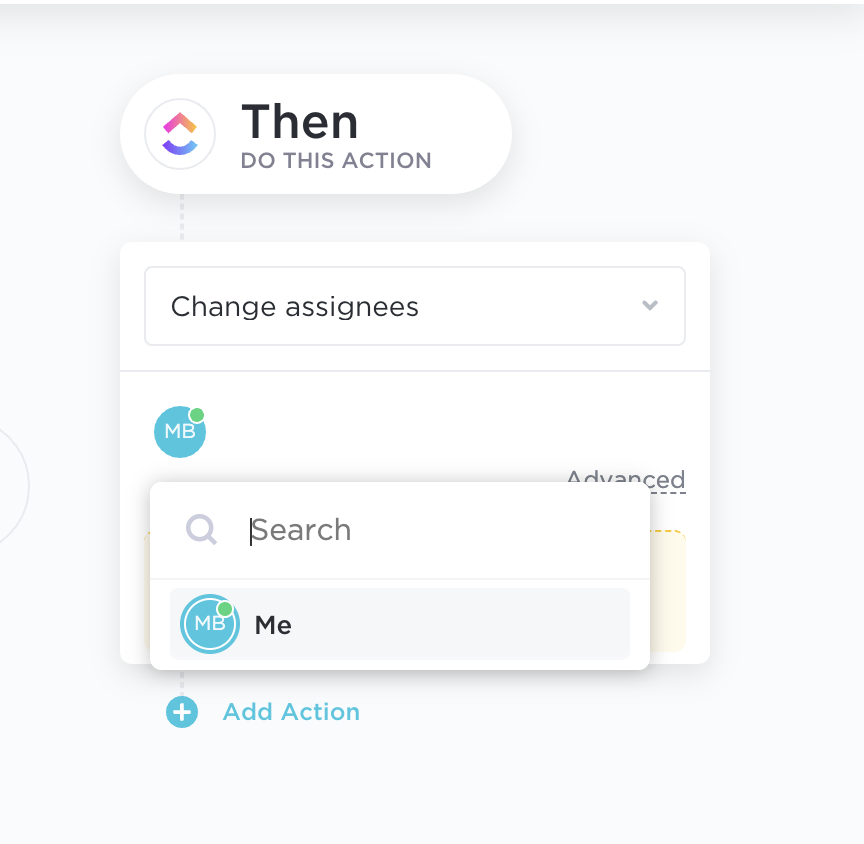
- In the automation menu, select status changes from “any” to “in review”, then change assignees to me. That way I’ll always know that these tasks need to be reviewed by me.
- If you’re on the business plan or higher, you can add conditions to your automations.
- Click “create” to save it.
Three Automations You Can Start Using Now to Stop Things From Falling Through the Cracks
- Automatically assign people to tasks
- When due date arrives, then change the status
- When due date arrives, then change priority to urgent
What automations do you already have setup in your workspace? What automations would you like to add to your workspace?
If you need help with automations or improving the structure of your ClickUp workspace so that you can start using automations, apply for a ClickUp Kick Off Session with me where you’ll get focused attention and answers to your questions from me, a vetted ClickUp Consultant.
