The combination of ClickUp and Missinglettr makes creating and sharing blog content a breeze! The process is smooth and many aspects of it are automated, which saves me a ton of time.
ClickUp for Blog Management and Content Creation
First, I dump all my content ideas in a ClickUp list. I have an automation in place in this list so when I create a task here, it automatically applies a certain task template which helps streamline and standardize the blog writing and publishing process. The ClickUp automation ensures that every new task that I add to this list will get an SEO table in the description as well as a process checklist. I also make sure to indicate any related services or websites that go with the content.

Content Development
Use the task description box to flesh out your ideas, create an outline, or share a Loom or Clip with your editorial team. The comments make communicating with the team about the content easy and simple. Make sure you have clear statuses so that everyone knows where you are in the content creation process. Using ClickUp for blog management helps my team stay on the same page throughout the process.
After the blog is out of the development phase, I have another automation in place automatically assigns the post to my editorial team. They then get to work on creating a blog post using the notes and videos l provide. The blog is written in a ClickUp doc and the comments are used to communicate about the content. After that, the status is changed as it goes through the approval process or gets rejected until it is ready for publishing.
The editorial team uploads the post on WordPress and I give it one last lookover to check if I need to upload images or make any changes. I also check the SEO settings and then publish the blog post. After it gets published, Missinglettr takes over.
Missinglettr
I use Missinglettr to automate posting my blog and blog content to social media.
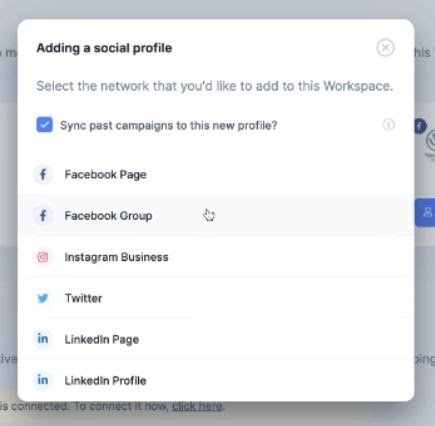
In Missinglettr, you can connect your social profiles to the dashboard by clicking on ‘Add social profile’ under Posting Settings. I have connected my Facebook page and my LinkedIn. You can also add Instagram Business, Twitter, and any other platforms listed.
Create Campaigns
As soon as you log in to the Dashboard page, you’ll receive some tips on what you should do. You can also create a post or a campaign right from this page.
You can use Missingletter like you would other social media schedulers in some ways, but its true power comes in automatically creating contents and posts, autoposting your blog content, and driving traffic to your blog.
Click on ‘Create Campaign’ and either paste in the URL of your blog post or, if you have your RSS feed connected, it will detect that automatically and prompt you to create a campaign. I highly recommend connecting your RSS feed because it saves you that manual step – and, you’ll also get an email prompting you to go to Missinglettr when it detects your newly published post.
If you want to determine all the details of the campaign yourself, you can choose Empty Campaign but I prefer using Auto Campaign because it does a lot of the work for me.
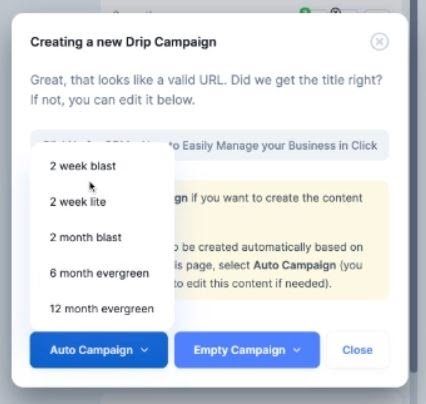
There are several options to choose from. ‘2 week blast’ would be good if you have an event coming up and you want to blast your social media accounts with that. I usually go for ‘6 month evergreen’ as my intention is to create evergreen content so I don’t need high volume posting.
Missinglettr is consistently one of the top drivers of traffic to my blog and website according to my Google Analytics.
Open up your campaign in ‘drafts’ and follow the prompts.
Here you can see that I have picked the ‘6 months evergreen’. Below them are the accounts where the post is going to be sent, so you can turn them on or off, based on your social media needs.
Hashtags
The first step is to pick relevant hashtags. It automatically displays some suggested ones which you can remove if you deem them unnecessary. You can also add specific ones of your liking. The recommended number of hashtags to be used is one to three.
Selecting Media
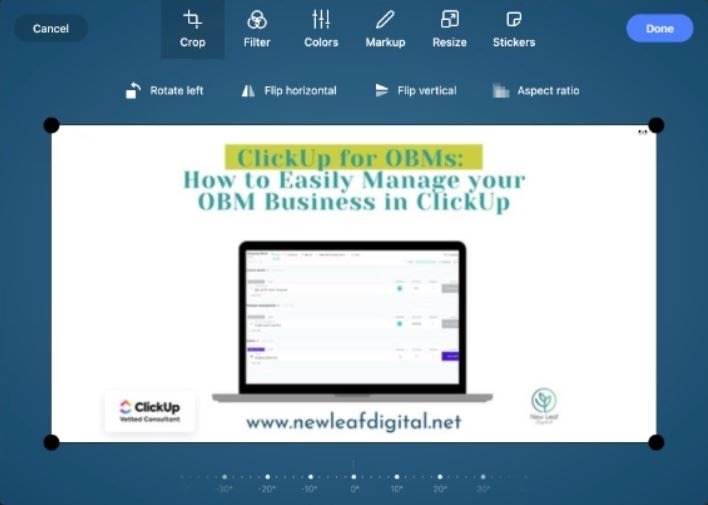
Next, comes the selection of media. It automatically pulls in the media from the blogpost. If you want to crop or add text or stickers, you can do so by clicking on ‘Edit’. It will load the image and let you crop or add filters, stickers, or even markups.
Quotes
Missinglettr will use artificial intelligence to pull out quotes from your blog content. Usually, the ones at the top are the best choice. Delete the ones that you don’t like and keep in mind that you need a certain number of quotes depending on which type of campaign you selected.
Once you are finished, click on ‘Build Campaign’. You immediately get a preview of what will be posted to your social profiles. Go through each day’s content to approve it.
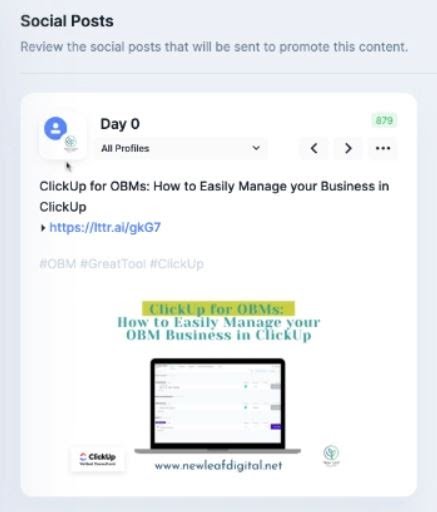
Once you are happy with your content, click on ‘Launch Campaign’.
Using Missinglettr, it takes me about 2 minutes to schedule 6 months of social content.
It is almost completely automated. If you go to Calendar, you can check out all the scheduled posts from your campaigns.
Curate
Curate is a different part of Missinglettr where you can search for different things to post to your profiles that other people have shared. You can also share your own content here. Start by clicking on ‘Create New Post’. Then select content from a previous campaign, and choose a campaign of your choice. Pick the quote that you wish to share. Click on ‘Publish’ if you are happy with the preview.
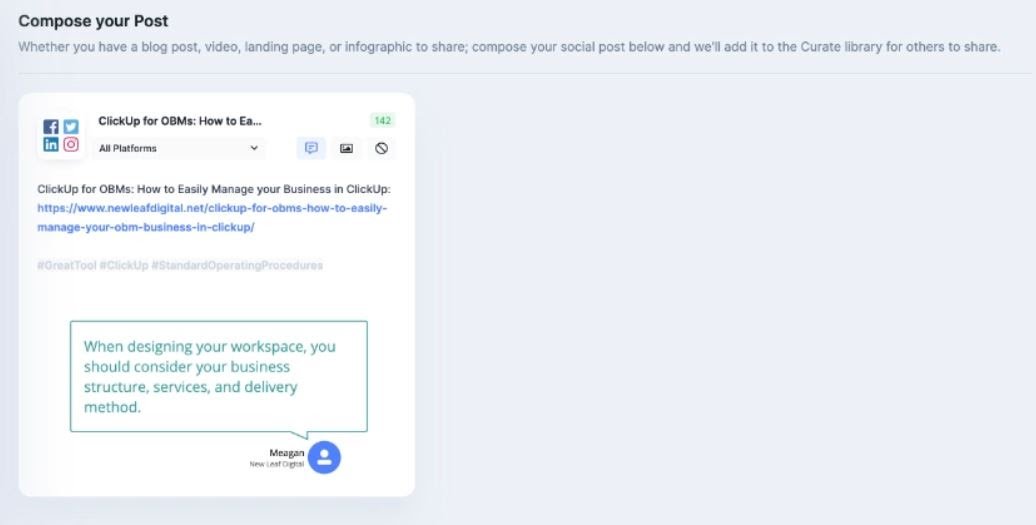
Your post will now be added to the Curate library. Now other people will be able to share your post to their social media accounts.
Analytics
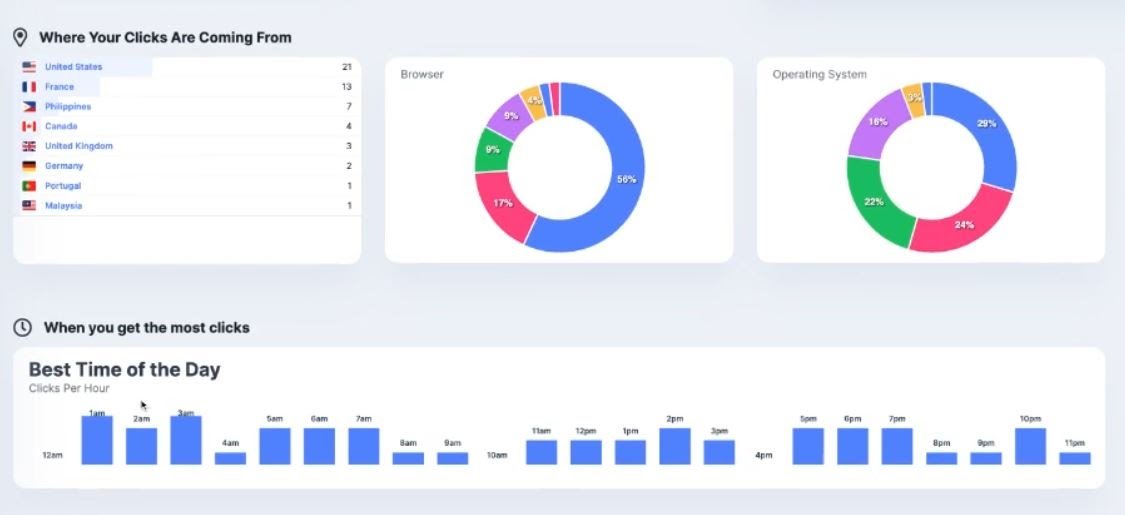
My website analytics show that Missinglettr is consistently one of the top drivers of traffic to my blog and website.
Check out my feature in a case study on MissingLettr’s website here!


