Google Forms is probably the most popular form builder out there. It’s free, pretty easy to use, and integrates perfectly with Sheets. From work requests to job applications, you can make a Google Form for almost any situation. But, when you want to track something in your project management tool, you don’t want it to be in a Google Form or Sheet. You want it right in the PM tool. And ClickUp has the perfect solution for this: forms!
Endlessly customizable like everything else in ClickUp, forms are the perfect way to communicate with clients who aren’t ready to sign up for ClickUp to communicate with you (give them a link to a form to submit questions, tasks, or even files), to ask for feedback on a project, or hire a new virtual assistant.
I’ve been helping a client with her hiring workflow over the past few weeks and wanted to share some tips about using ClickUp forms for the hiring process. The next post will look at how to streamline and automate the screening process.
How to Create a ClickUp Form for Hiring
To begin, create a new list for it and name it as ‘VA position’.
To do so, first, click on + View. From the drop-down options, select Form. Note that you cannot add a form view at the everything level. You can add one at the space folder or list level. Then select Add View after clicking on Form.
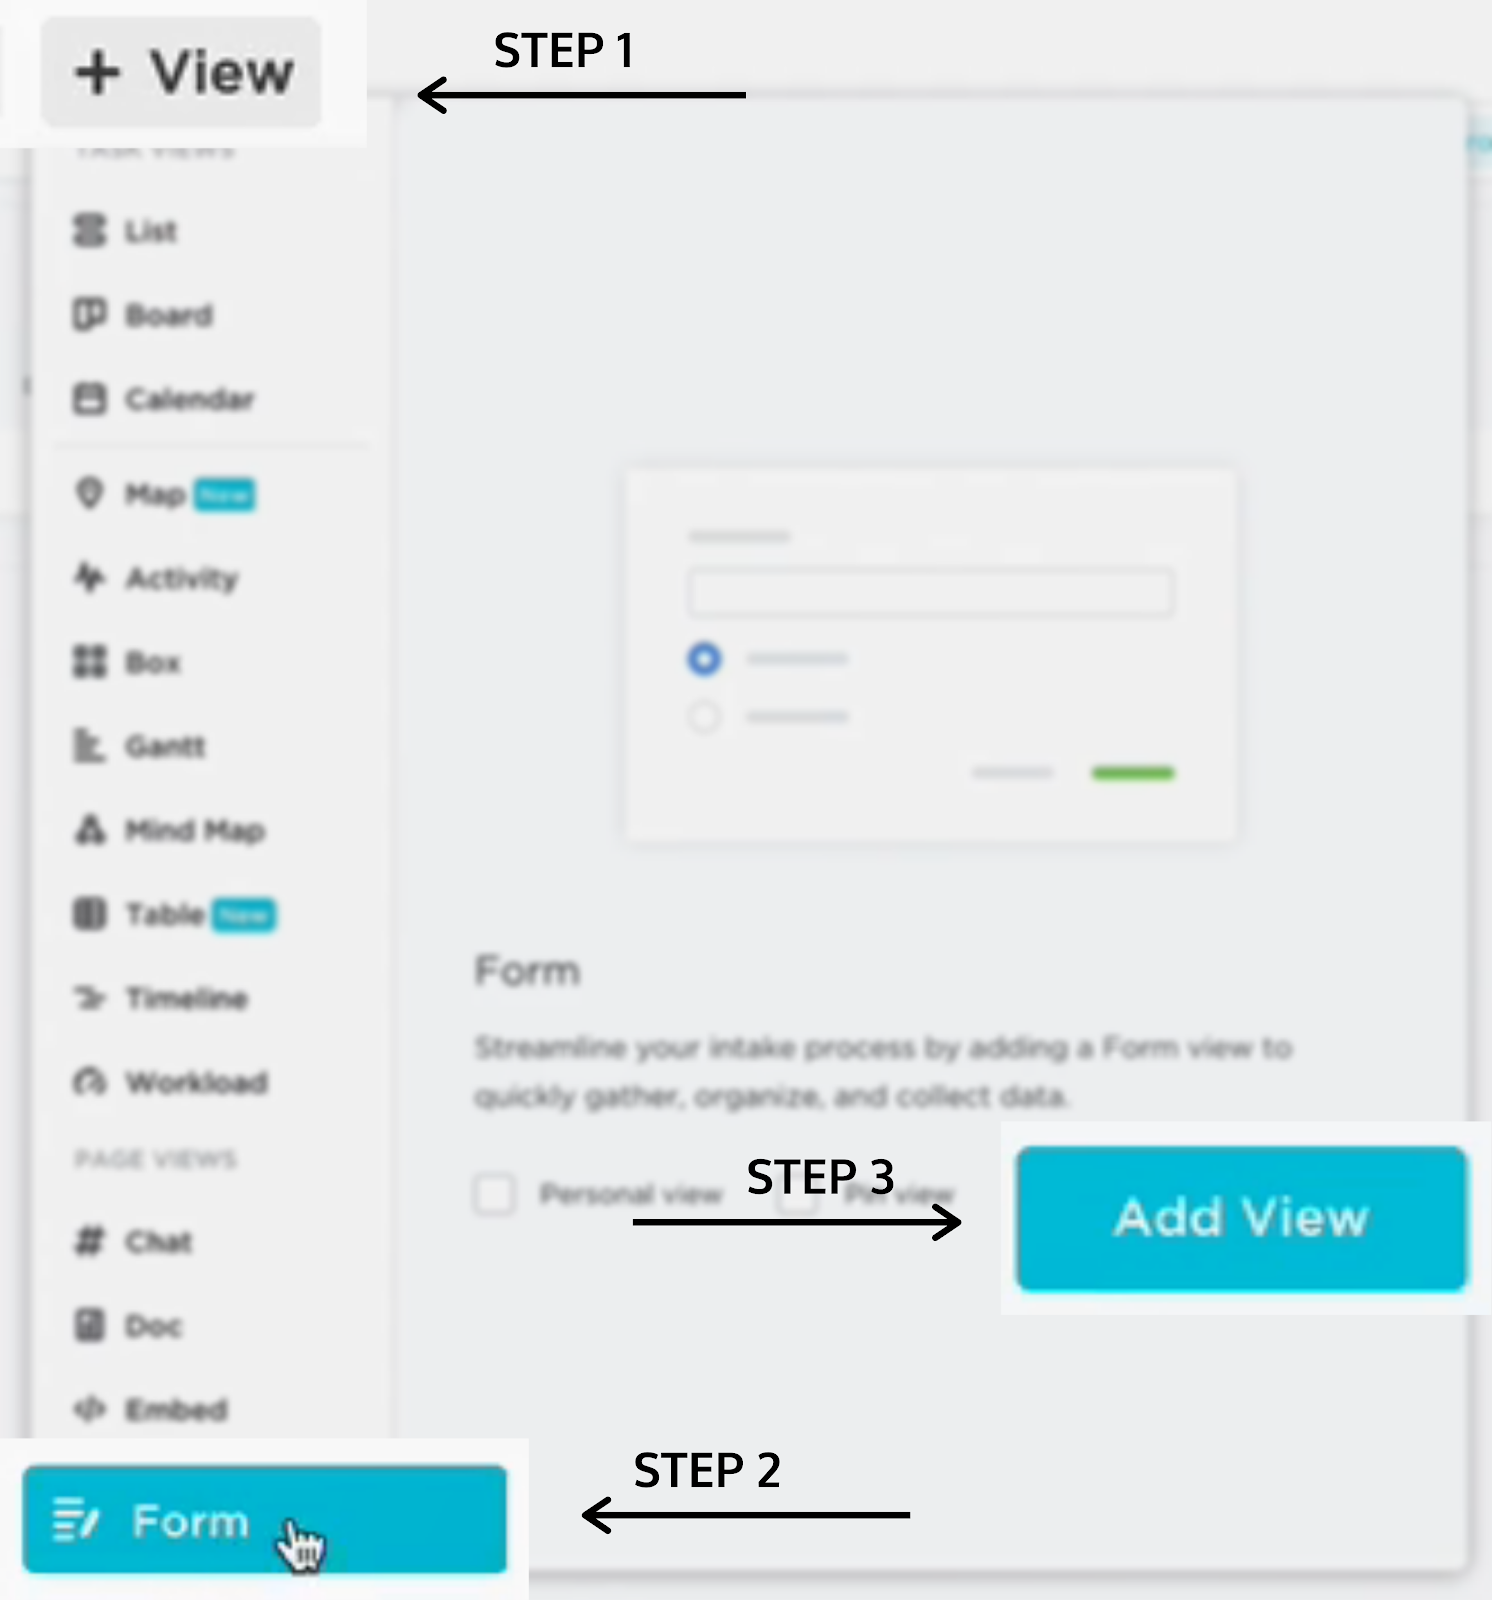
Now, the basic form has been created. Do keep in mind that some of these features are on available on the business plan, which I am using.
Write The Description
The next thing to do is work on the description of the ClickUp form. You can create a banner using “/banner” and use this space to add the details of the job opening. You can also use the rich text editing to add in some extra features to make the points more clear. Title the description as ‘Job Overview’ and rename the form to “Virtual Assistant Position”.
When you build the form directly inside ClickUp, you can easily collect data and track candidate performance, send emails, and see the status all right from one single dashboard.
In the job overview, you can use bullets to list out details like “complete administrative tasks up to five hours a week” and so on. You can also use another banner and pick a different color for it. You can add information about your company like your mission, vision, and values.
Optional Aesthetic Features in the Form Description
You have many features to choose from to give a nice finishing touch. Some of the features include checklists, a divider, making the text bold, giving it a different background, highlighting options, and many more. You can even embed a video about the position or your business.
Want to have a hiring form in your ClickUp workspace in only 2 clicks?
Grab my ClickUp Forms Template bundle, which includes a hiring form ClickUp template and applicant tracking system, complete with automations built for you.
Creating The Body Of The ClickUp Form
Now let’s start by building out the form. The first question that you should have on the form is the applicant’s name. To add that, select Task Name under TASK FIELDS. Drag and drop it in the space that says Drop It Here. Drag over any other fields from the left side that you’d like to include in the form and rearrange them.
Make sure you rename Task Name field to First and Last Name by clicking on the pencil icon to make sure that the name of the task when submitted is the applicant’s first and last name (if you don’t do this, you’ll see each submission (task) named something like “submission 09-09-2021 37514820afasdf” – that doesn’t make it easy to differentiate between the submissions.
Make sure that you are always editing the text and field so that you get the best responses. You can also choose whether you want to make the information mandatory.
Next, ask for their start date, so you know when they are available to start. To do that, click and drag on Start Date under TASK FIELDS. You can also rename the Start Date field to “When are you available to start?“
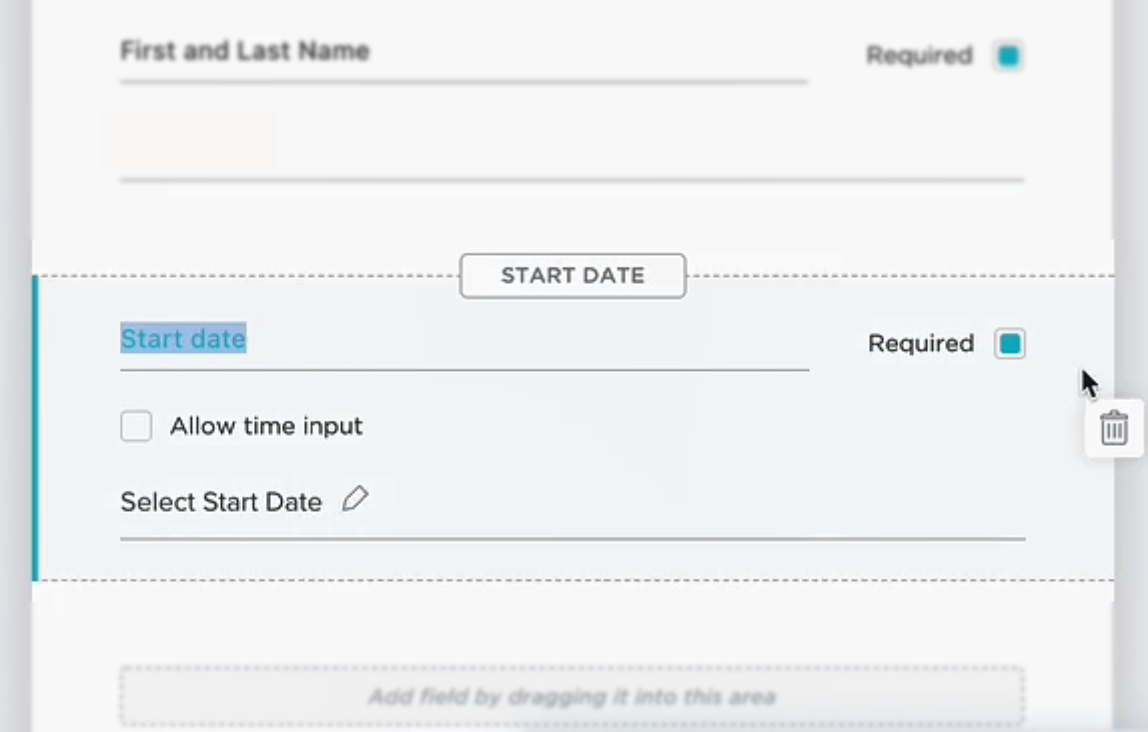
Customize Your Tasks Fields
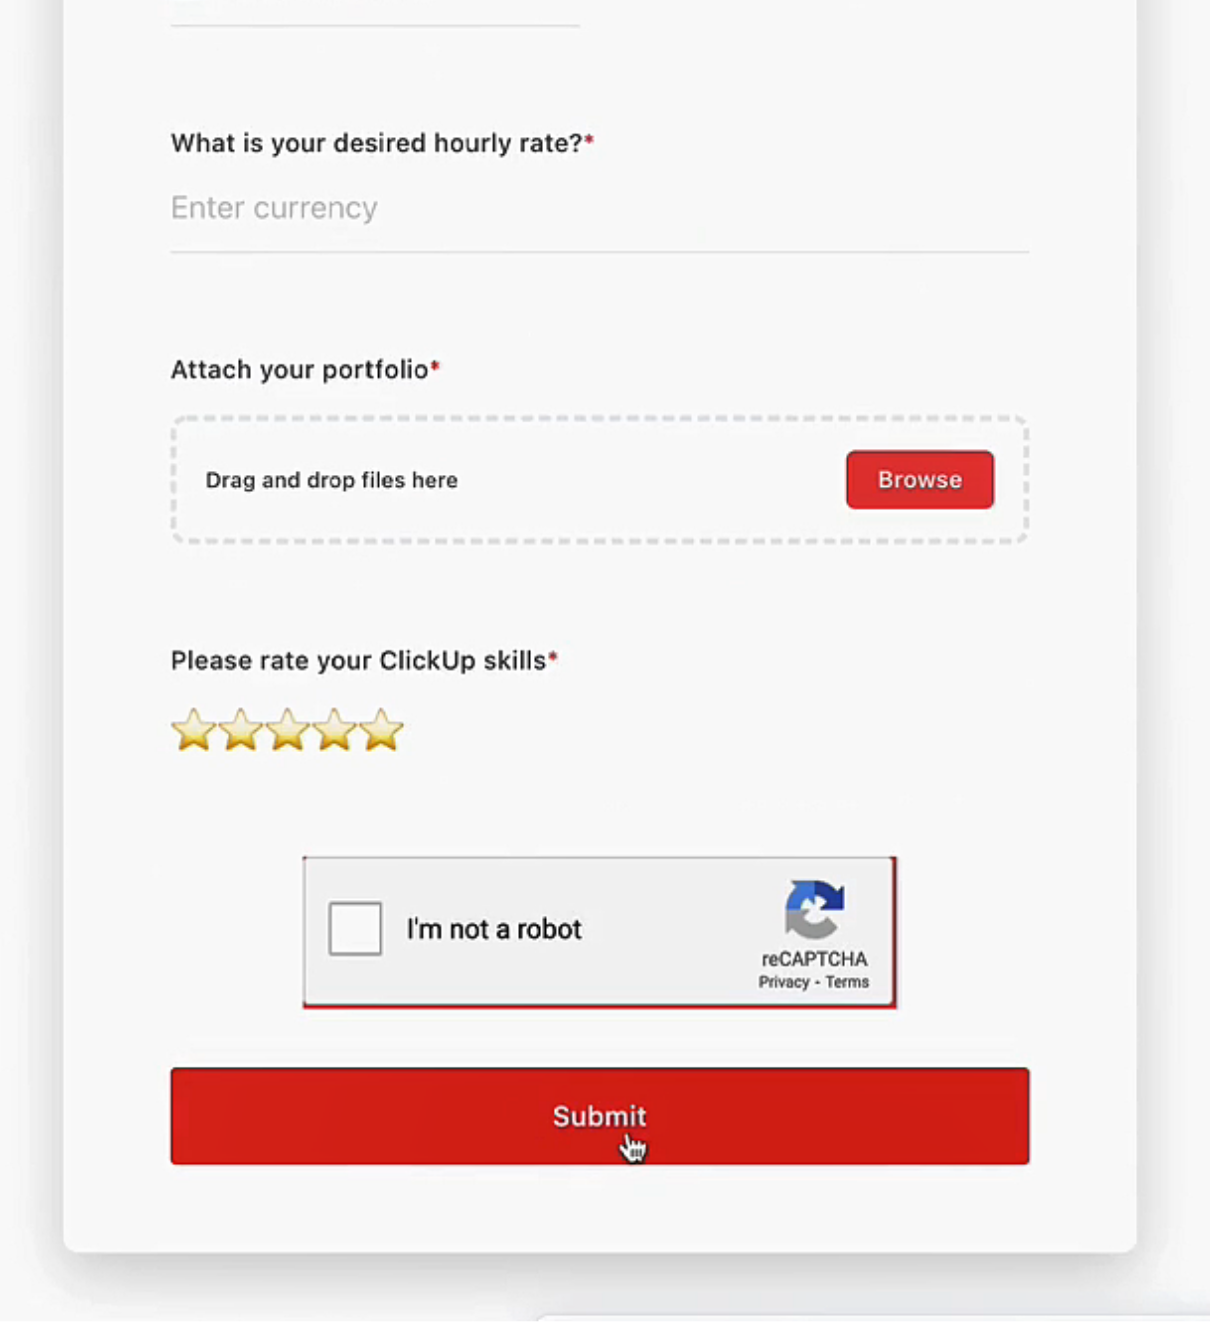
When none of the options under the TASK FIELDS suit your specific requirements, you can opt to customize by clicking on Add Custom Field. Using that option, you can ask for their desired hourly rate. You can show that these question-type custom fields are different from your other custom fields by calling the custom field “Q [for question]- field short name”, so it would read “Q – Hourly Rate”. Now, select and drop it on the form and rename it to “What is your desired hourly rate?”
You can add a variety of custom fields: dropdown, labels, check box, email, and even have the person who submits the form attach files, like their portfolio. You can even ask them to rate their skills. Under Add Custom Field, you can choose Rating and add it to your form by clicking and dragging on it. Rename the field to read “Please rate your ClickUp skills”.
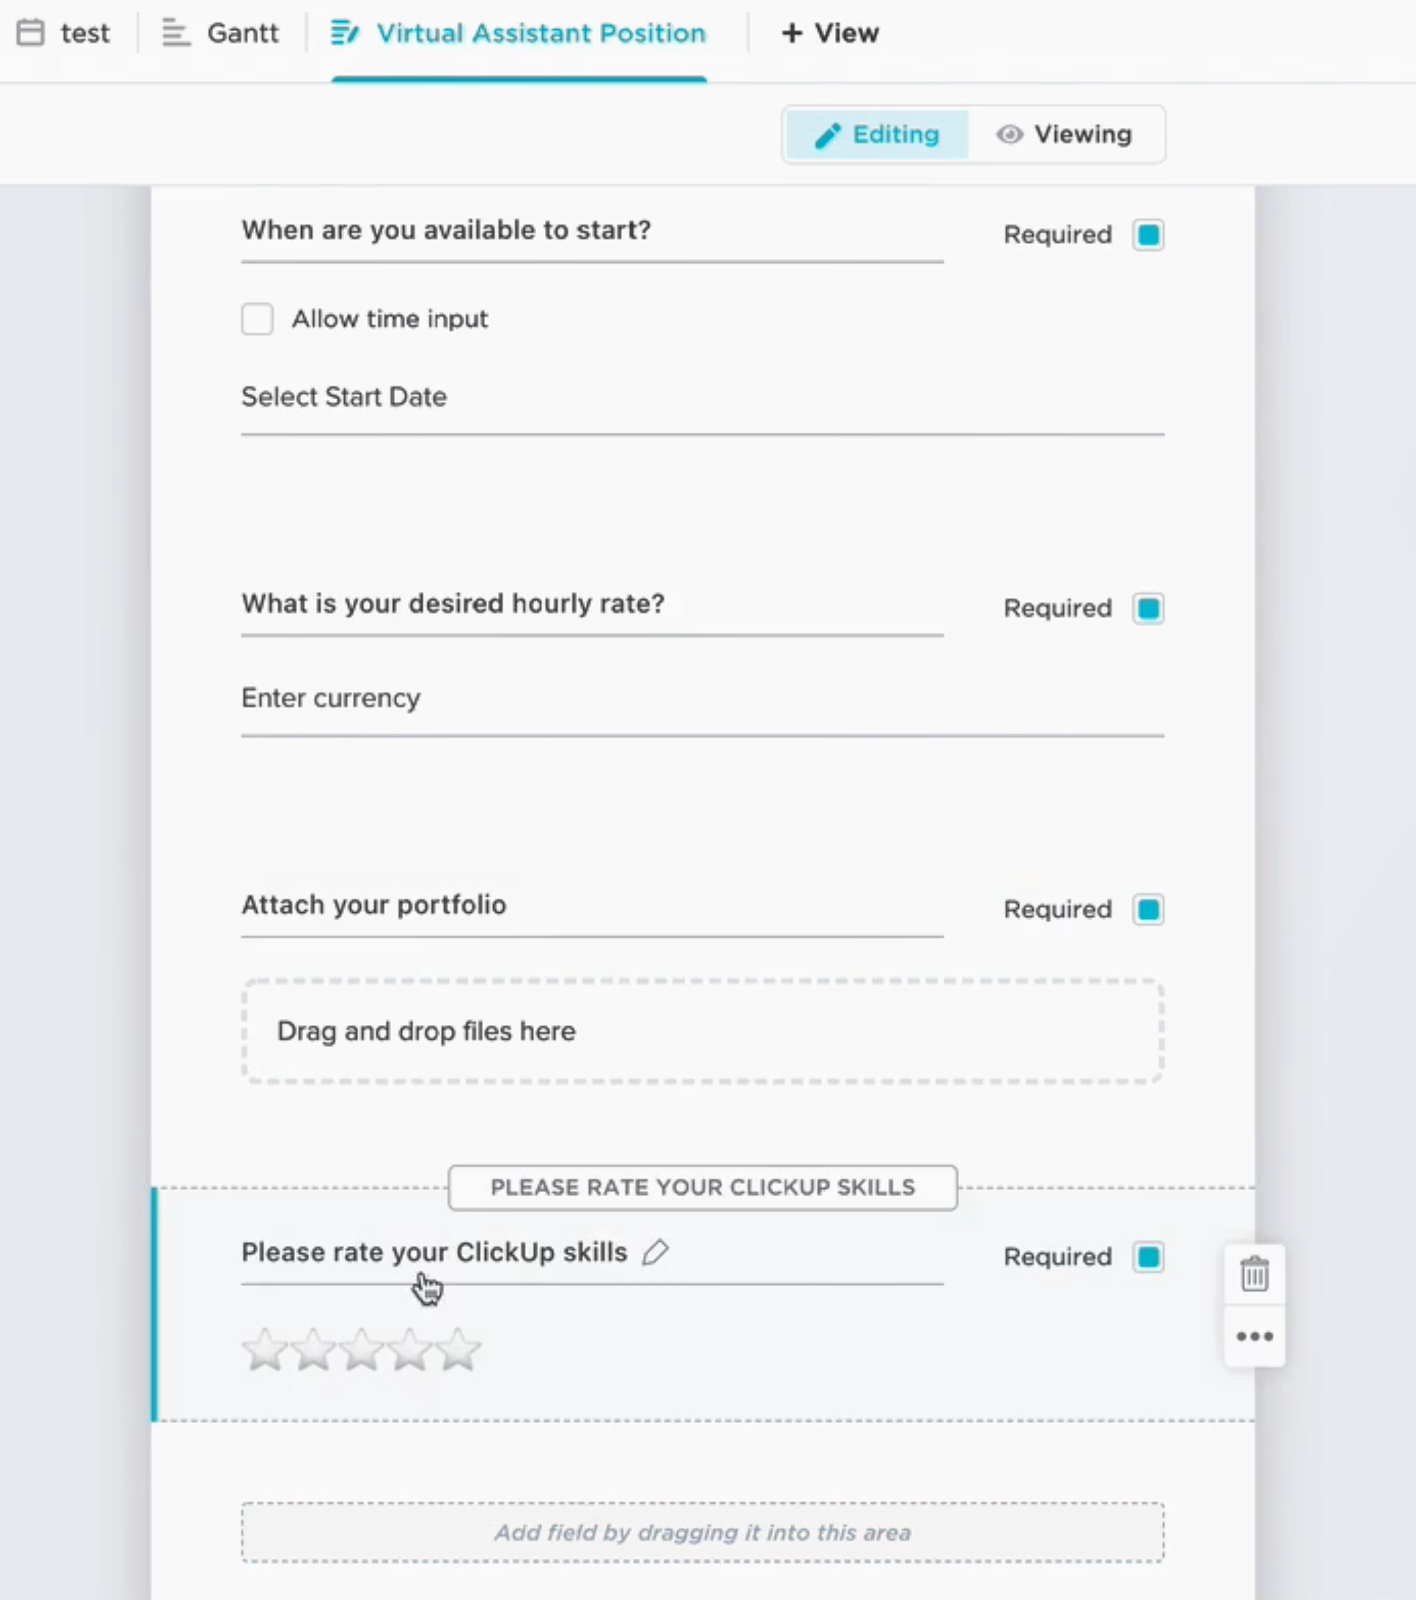
On the right side of the page are the form settings. Keep in mind some of these are only available on the business plan.
You can save your form submissions, which are actually tasks, under any list you choose. You can also auto-assign the tasks to anyone of your choice. If you have a task template that will help you process the submissions, you can automatically apply the template to every single task that is created out of the form submissions. You can even have it redirected to a certain URL that could be your website URL or a PayPal invoice.
Themes And Colors
You can select either the light or dark theme. Another option available is to change the primary color.
You can have all the answers added to the description. You can also add the reCAPTCHA in the business plan, and edit the form response if you wish.
You can automatically apply the template to every single task that is created out of the form submissions.
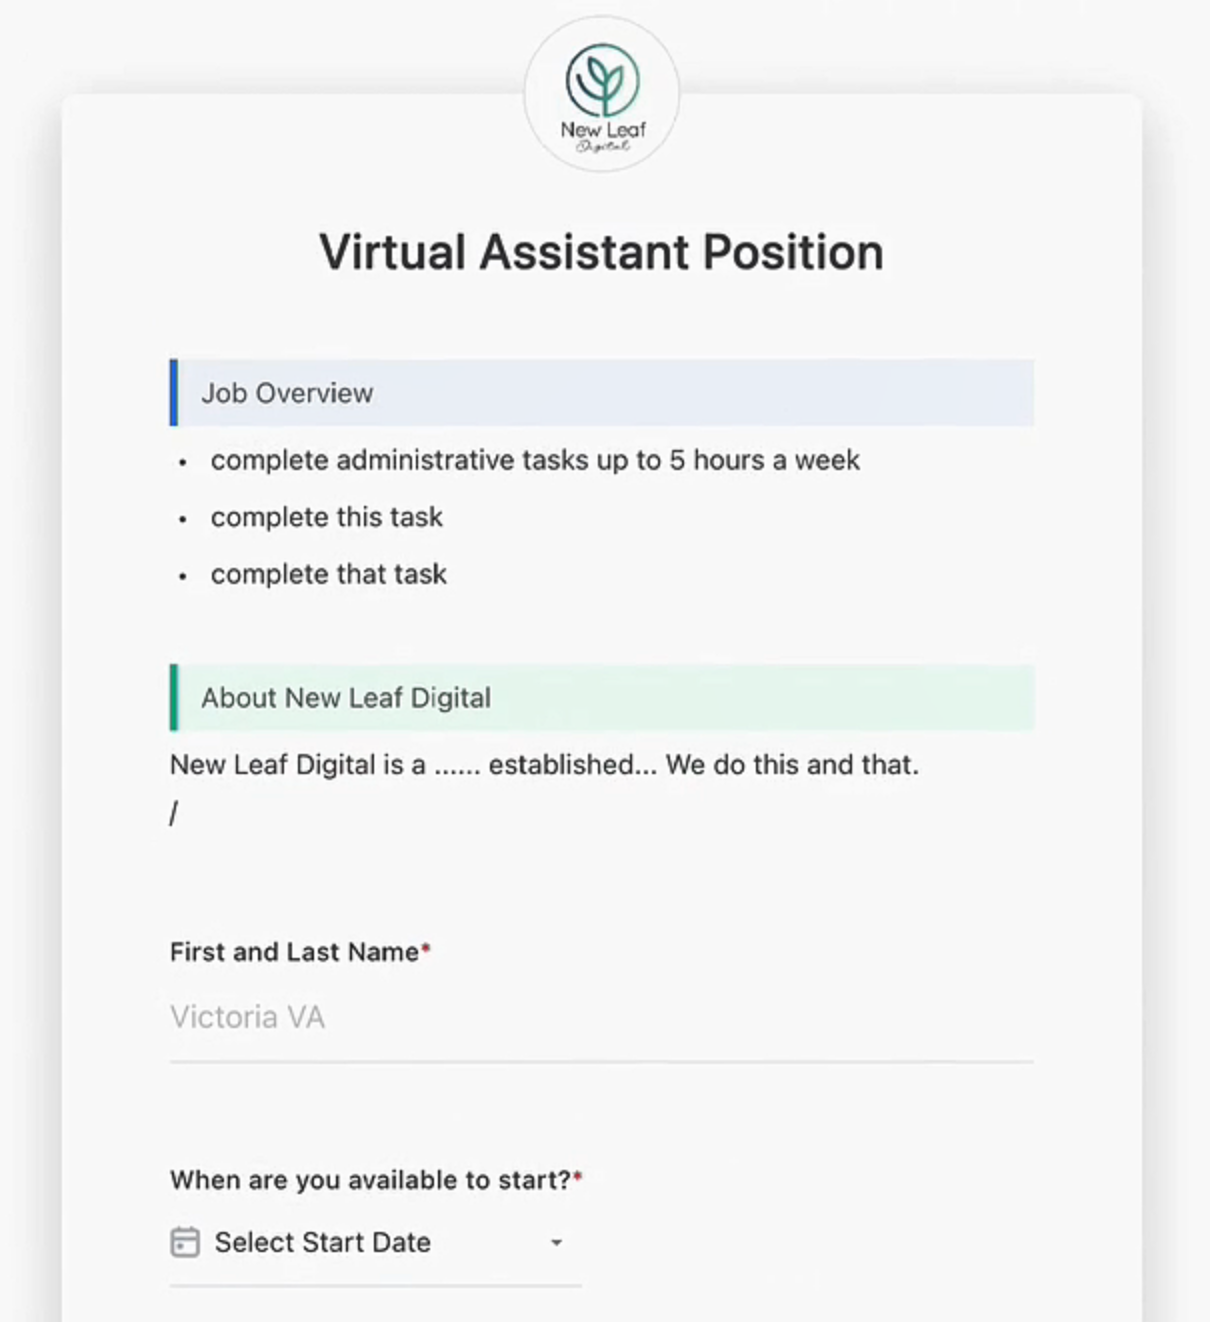
By clicking on Viewing, you can check out how the form looks to others. You will find the description followed by the questions you want them to answer. You can test the form by completing it yourself and even view the thank you message they will receive.
Here is an example of how the final form will look.
How To Efficiently View the ClickUp Form Submissions
After receiving the submissions, you can view them all by clicking on the List which you designated for the responses. You can customize the list view so you that you’ll only see the information that you want to see and hide the other columns. Only show those that will help you process the submissions. For example, in this hiring form example, you may want to show their ratings, hourly rates, and portfolio item.
You can use the “group by” feature to help you eliminate unqualified candidates. When you want to make your first round of eliminations based on people who had a low self-rating of ClickUp skills, you could group them by utilizing the Custom Field option.
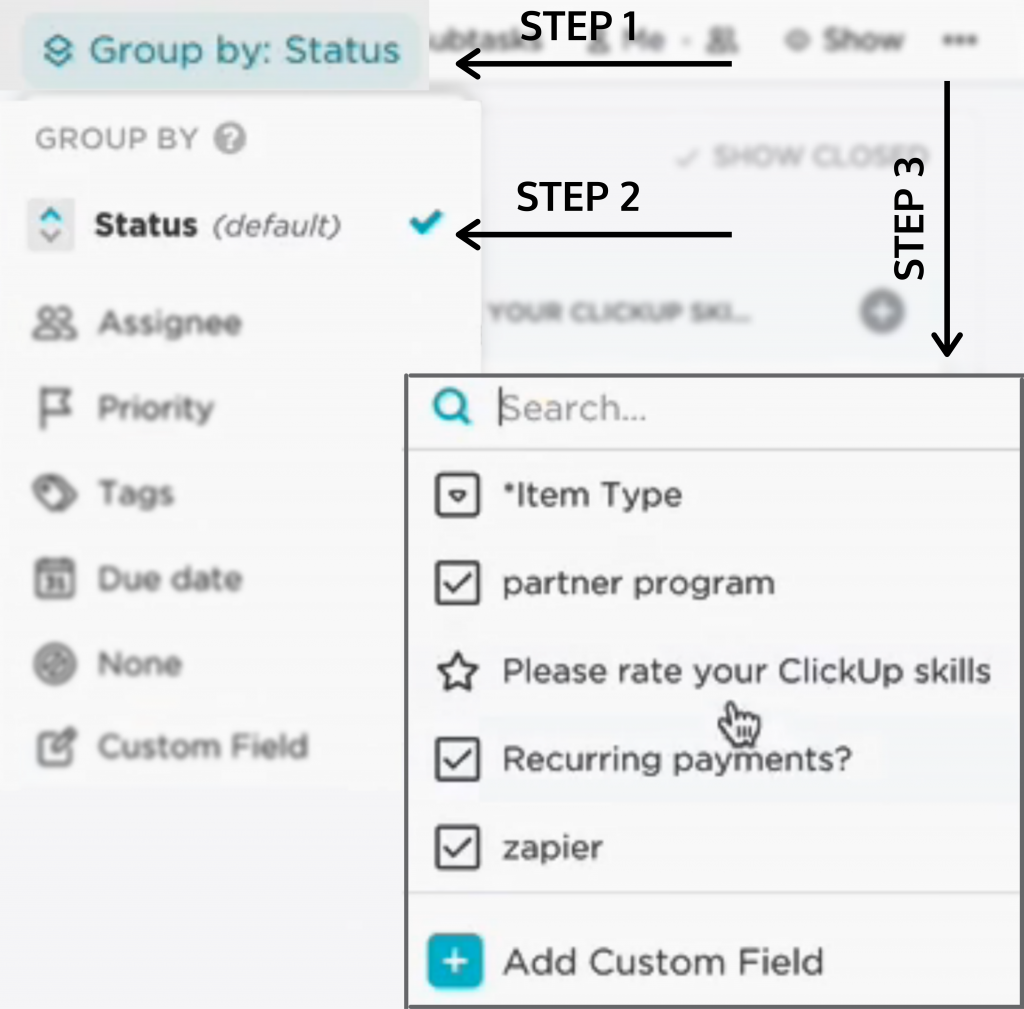
You can choose to keep the people who rated themselves with four stars and above while eliminating anyone with three stars and below.
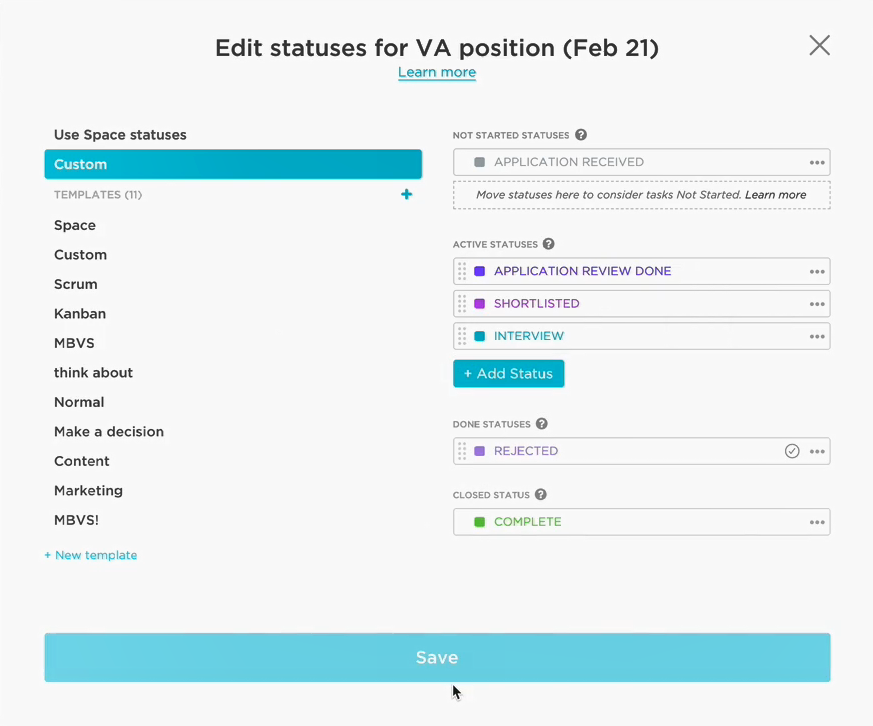
You also need to consider and decide what statuses you want to have while hiring. The default custom statuses are not appropriate for hiring.
You can change them by selecting Edit List Statuses. For example, the statuses could be “Application Received”, “Application Review Done”, “Shortlisted”, “Interview”, “Rejected”, “Complete”.
Note that stages of the application process can be used as statuses as long as they are clearly marked. For other types of forms, make sure that you are using custom fields for stages and not the statuses.
Another cool feature of ClickUp is that you are able to send an email to the rejected candidates right from the inside of ClickUp. In fact, you can create a template and save it for future use. This will be able to be automated in the near future! You can view the sent email on the task card and reply to it from there.
How To Share The Form
This is a basic example of how you can use ClickUp forms for hiring. To share the form publicly, click the share button and copy the link. You can use the link to share it with your network.
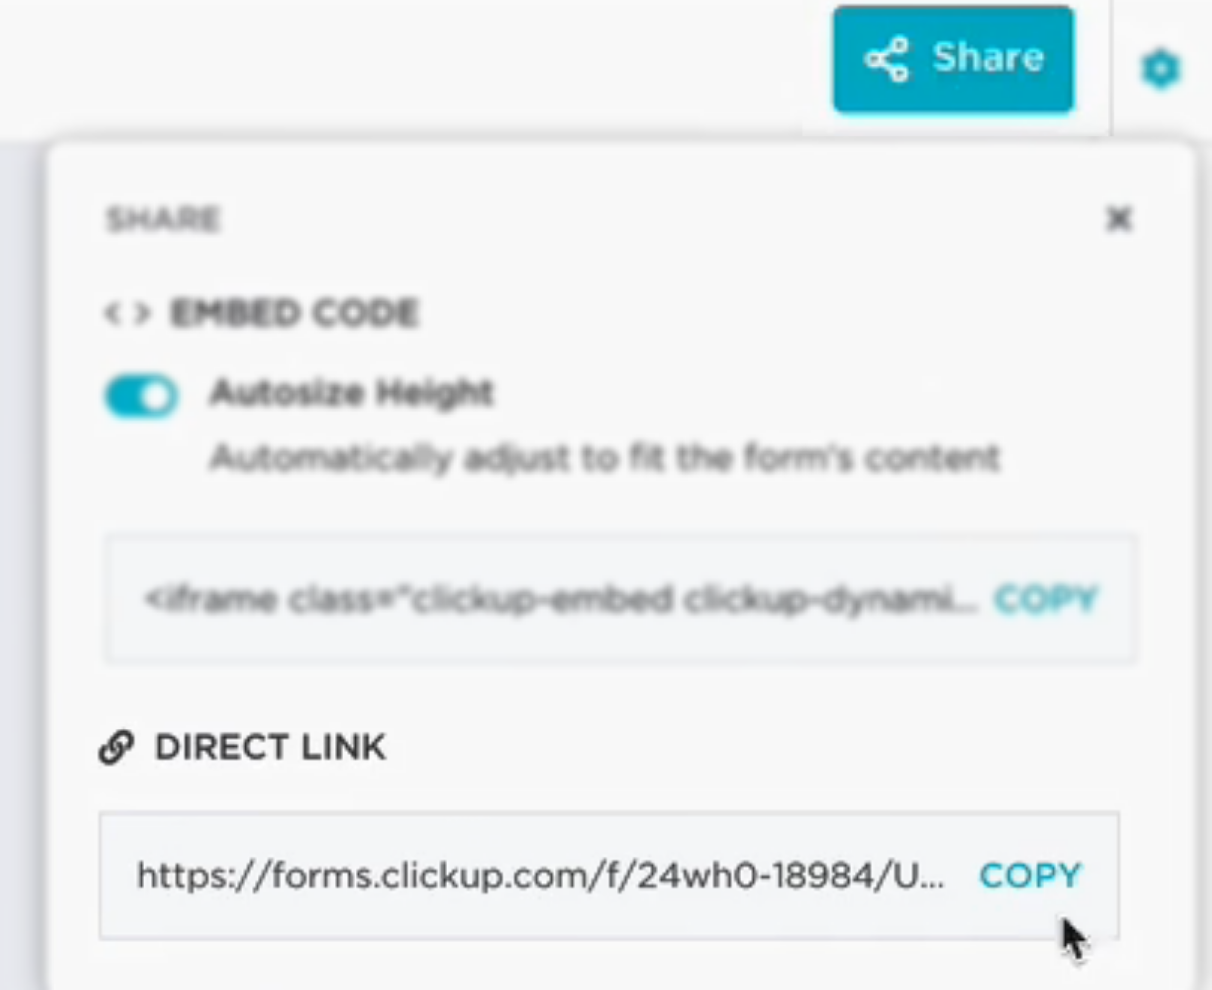
Simply share this link everywhere and start collecting leads for your future VA!
There are more advanced things that you can do with automation. Check out this blog post for more information.
I hope that you found this helpful and please leave any questions that you might have in the blog comments.
Want to have a hiring form in your ClickUp workspace in only 2 clicks?
Grab my ClickUp Forms Template bundle, which includes a hiring form ClickUp template and applicant tracking system, complete with automations built for you.


